Thursday, May 30, 2013

Stuffed Zucchini with couscous

I’ve been super busy this week so I’m just posting a quick vegetarian recipe today that will revolutionize your dinner.
This is a great vegetarian meal that you can easily make in 15 minutes (of preparation) + 35 minutes in the oven.
This stuffed zucchini will satisfy your hunger and keep you full longer, thanks to the couscous.
 

Stuffed Zucchini
 
Ingredients:
4 zucchinis cut in half (center removed with a spoon)
1 cup Couscous
½ cup Shredded Mozzarella cheese
2 tablespoons Sour cream
Salt
Pepper
A handful of Parsley
Zucchini center
Panko on top

 
Directions:
For the couscous:
The Couscous was made with sautéed onion and garlic in olive oil, and salt, pepper and parsley to taste – you can either add water or dry white wine to cook the couscous. If you use 1 cup couscous, use 2 cups liquid. That’s the ratio, always double the amount of couscous. Turn off the heat and leave the lid on for about 5 minutes and it should be ready. The couscous will absorb all the liquid and get fluffy.
 
For the zucchinis:
To stuff the zucchinis, just combine all ingredients in a bowl and spoon the mix into the zucchini half. Top them with panko and bake at 375F for 30 min and 5 more min on the broiler to get that delicious golden crust. Yum!
 

What do you do with the leftover mixture?
If you have any leftover stuffing you can use them to make corn cakes.
 
Add 1 can of corn, 2 eggs and ½ cup flour and 1 teaspoon baking powder. Fry them in a little olive oil and you have another great vegetarian meal in about 10 minutes.
 
You should also try zucchini on pizza - just slice it thinly lengthwise and use as a pizza topping along with mozzarella, tomatoes, black Kalamata olives, etc… and a drizzle of olive oil.
 

Sunday, May 19, 2013

Requeijão


Homemade Requeijão


Requeijão is a cheese spread that originated in Portugal and was widely spread in Brazil in the 20th century. It is a white creamy cheese, similar to ricotta in taste but with the consistency of condensed milk. In Brazil you can find it in everything. From pão de queijo filled with requeijão, to pizza with requeijão stuffed crust, this creamy cheese is absolutely everywhere. 

I personally love it on bread in the morning, very well accompanied by a glass of freshly pressed orange juice.


It is impossible to find this variety of cheese spread in Canada and so I decided to try and do it myself. After a long research and some adaptations to the recipes found online, I came up with this version that is very healthy, delicious and with a very close consistency. The taste however is not exactly the same, but close enough.

I hope you enjoy it as much as I did!

Here is the recipe:

Requeijão

Ingredients:

2 bags of fresh milk (or 2.66 liters) – if you can find cow’s milk directly from a farmer, even better, if not any kind of pasteurized milk works. I used 2 %.

6 tablespoons of white vinegar

1 ½ cup of cream (35%)

Salt to taste

Enough milk to adjust consistency (about 1 cup)


Directions:

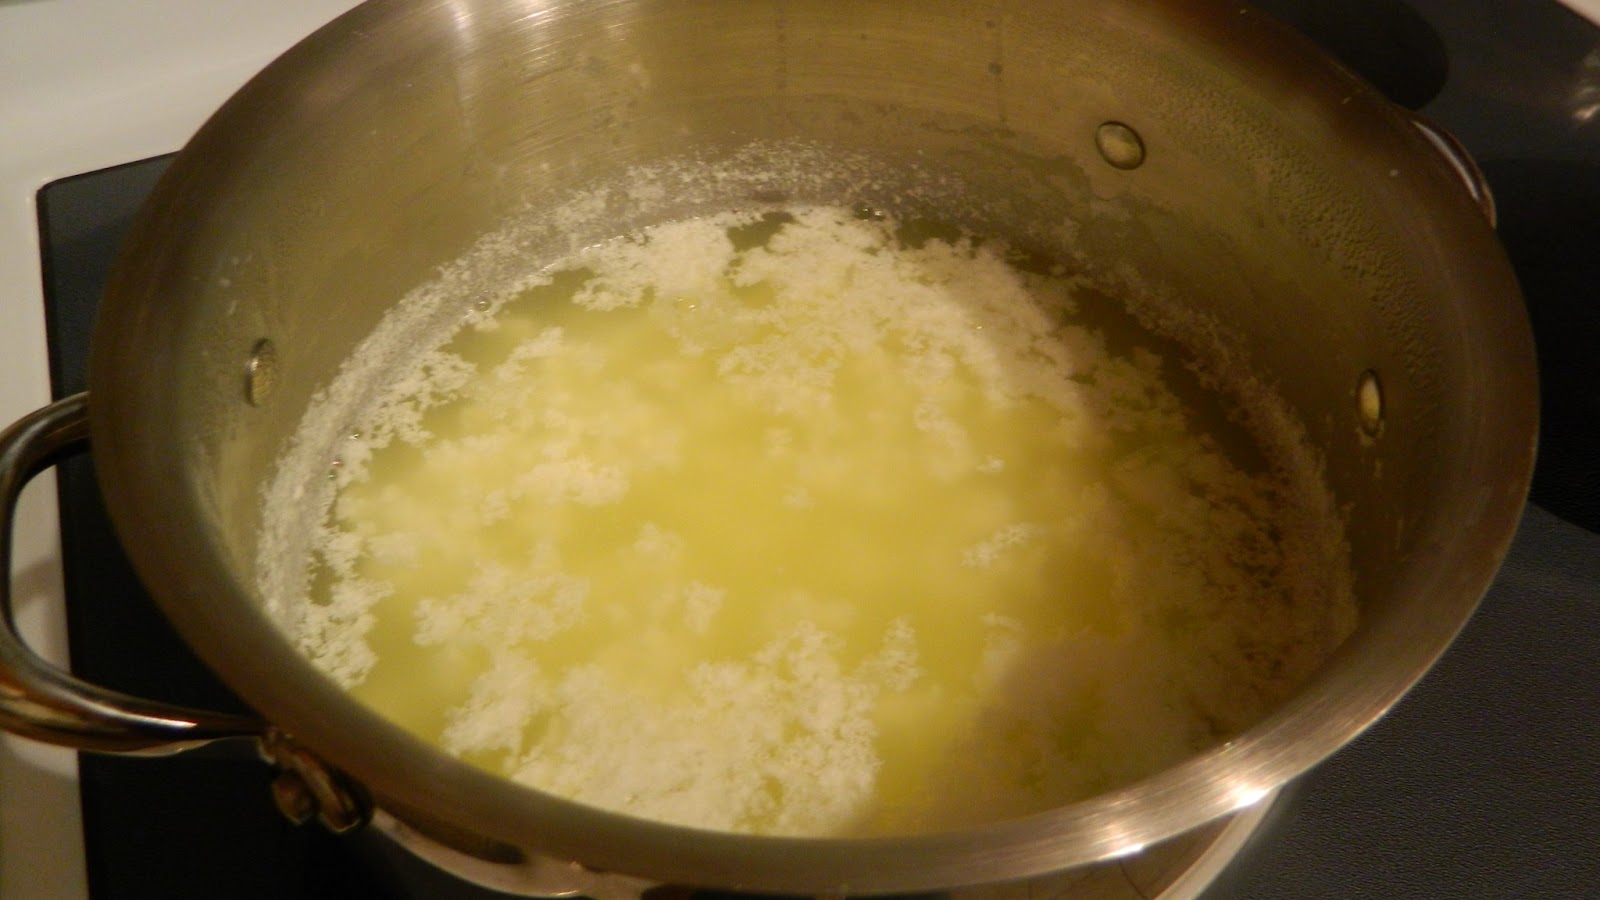
Boil the milk in low heat.
 

Remove from heat and add the vinegar and stir with a spoon. It will instantly separate the cheese curds from the whey (greenish liquid).
 

Using a sifter, collect all the cheese curds and drain well. Discard all the whey. Because of the vinegar, it’s too acid and you cannot reuse it. If you have a farm, you can feed it to pigs. They will like it.
 

Place the cheese curds in a blender and add the cream and the salt. Mix well. Add the milk in steps to adjust the consistency. Keep in mind that once it goes to the fridge it will thicken up, so you might wanna make it more liquid than desired at this point.


Taste it, adjust salt if needed and pour it into a medium glass container (sterilized with boiled water and bleach and washed well). This recipe makes 2 containers.
 

Keep it refrigerated for up to a week.


Pão de queijo recipe


Ingredients:

500g polvilho azedo

1 tablespoon salt

1 cup water

½ cup vegetable oil

1 cup milk

3 eggs

Water or milk enough to adjust consistency (about ½ cup)

Grated Mozzarella cheese – as much as you want or enough to make it tasty and thick. About 2- 3 cups


Directions:

Mix the polvilho with salt. Reserve.

Boil the water and oil. You can add the milk and boil it together or reserve it cold for later to help you cool down the mix before adding the eggs.

Once liquids are boiled, pour them slowly all over the dry ingredients and beat well in the stand mixer until everything is well combined. (Use the paddle attachment and turn it off as soon as the mixture combines).

Add the milk if not added before and mix well.

Wait until it cools down a bit so you don’t cook the eggs and add them one at a time while beating in low speed. Increase it to medium speed and beat for about 1 minute more.

Add the cheese and keep beating until it all comes together nicely. Add more milk or water if necessary to have a good consistency, not too hard and not too soft. Good enough to roll using your hands or to use two spoons and pour the batter onto the baking tray.

Make small balls (use cold water on the hands and it will be easier to roll) and place them onto a non-greased baking tray.

Bake for about 30 minutes or until golden.
 

Enjoy them with your homemade Requeijão!


Monday, May 13, 2013

The blog is back and all new!

I would like to apologise to my readers for the interruption on the posts and for the change in the blog
address URL. Now there is a number 2 after andiesfood.

I was recently robbed and my cellphone stolen, unfortunately with all my info and access to my gmail
account. The person who did it decided for no reason to delete my google account causing me to
subsequently lose my blog! I’m still furious about that as I didn’t have any backup and cannot access my gmail anymore.

I spent days trying to recover the blog, but unfortunately google doesn’t have any real support,
especially in Canada, with only one office that doesn’t answer the phone. The only support they’ve got is the forum that unfortunately is not that helpful either. Everything I did sent me back to their support page with only two options: I either have to receive an SMS to my cellphone with a code to verify it’s really me trying to recover the account (which I couldn’t do as the phone was stolen and the line was automatically canceled so the thief wouldn’t make any international calls on my expense – and it has to be the same number you have in their file from when you last updated it) or I have to answer some security questions, and I thought, well, that’s fine. Except that you have to be 100% accurate, including knowing the date (day, month and year) that you first created the account, and unfortunately I didn’t know that would be so important to have in hand at the time!

So, there you go, a full amount of tears, angry explosions and headaches later I just came to accept I lost the blog for good.

And now, 4 weeks later I can finally sit down calmly to create this new blog and hopefully get all of your audience back.

I promise to back it up every week from now on and to answer all the questions you may have about old postings.

So bare with me here, in the beginning of a new adventure but hopefully with the same excitement.